If you have been diving into the Flashpoint update for Arc Raiders, chances are you have picked up the Fragmented Logs quest from Shani. This mission sends you deep into the highly dangerous Stella Montis map to interact with three separate data terminals. It can be a pretty tense run if you do not know exactly where you are going, but the good news is that you do not have to risk doing all three objectives in a single deployment. You can easily chip away at them across multiple runs.
Here is a complete breakdown of how to find each terminal, some tactical tips to help you survive the trip, and what you will get for your efforts.
Quest Locations and Steps
1. Repair the Out-of-Service Terminal
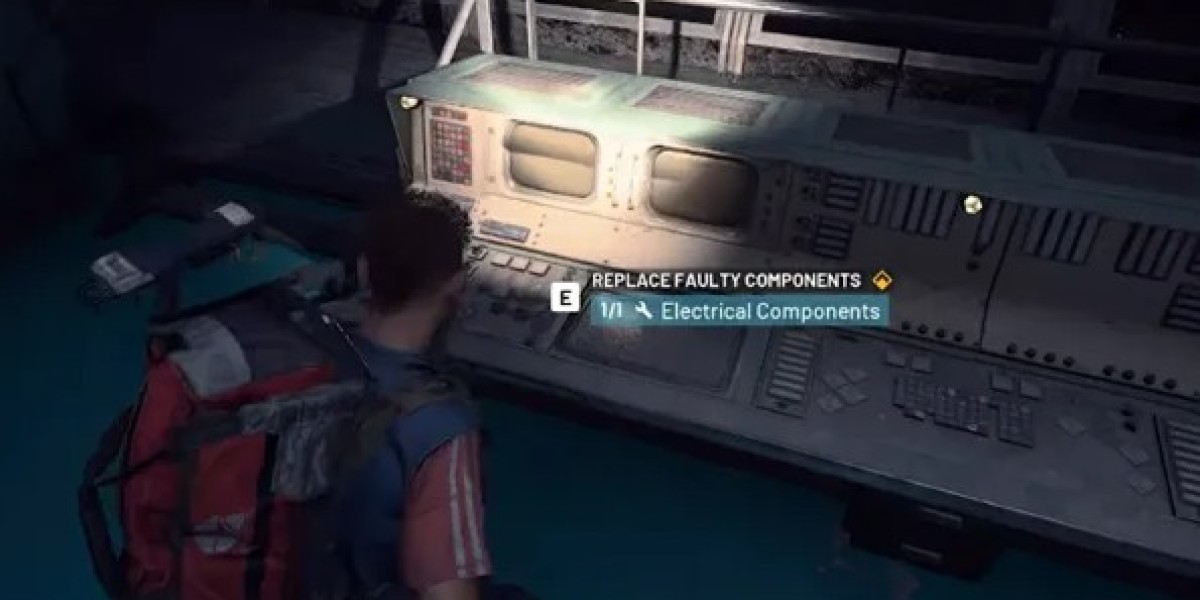
Your first stop is the Robotic Sandbox Control Room, which is located in the central upper layer of the area. Before you even head out, make sure you have one Electrical Component in your inventory because you will need it to fix the console.
To get there, look for the bridge pass-through that runs between the Assembly and the Lobby. You want to make your way into the elevated control room area, which you can easily access via a back-hallway zip line. Once you are inside, approach the broken console and interact with it to select "Repair Faulty Components."
2. Enable the Power Conduit
Once the first terminal is repaired, your next objective is located in Control Room A3, on the northeastern side of Robotic Sandbox A. You do not need any specific items for this step, but you do need to survive the drop from the previous room.
Carefully drop down to the ground floor of the sandboxes and follow the hallway that leads toward the metro corridor. Look out for an alcove marked Control Room A3. Head inside and look at the right wall—you will see a generator-style box with a lever. Flip the Power Switch to get the power flowing.
3. Boot the Main Frame Terminal
The final step takes you to the Cultural Archives Service Backrooms on the far east side of the map. Keep in mind that you cannot complete this step until the power has been enabled from the previous step to build the mainframe.
From the sandboxes, travel east toward the Seed Vault and push through the East Tunnels to reach the Cultural Archives. Once you are there, fight or sneak your way into the service backroom area located right in the center-middle section of the archives building. Enter the small server side room, walk up to the computer desk, and select "Bring Online."
Tactical Survival Tips
Stella Montis is unforgiving, so keeping a few strategies in mind will make this quest much smoother:
Prep Your Components Early: If you forget to load into the raid with an Electrical Component, do not panic. You can quickly scavenge and recycle items like a Wasp or a Phone and Driver early in the match to get what you need before heading to the first terminal.
Watch Out for Shredders: Both the Cultural Archives and the Sandboxes are crawling with aggressive ARC variants. You will run into plenty of Ticks, Fireballs, and lethal Shredders. Move cautiously, use cover, and lean heavily on stealth whenever possible to avoid unnecessary fights.
Secure the Room: When you finally reach the computer terminal in the Cultural Archives, make sure to close the backroom door behind you. Getting caught in an interaction animation makes you a sitting duck, and closing the door prevents roaming Ticks or opportunistic players from sneaking up on you.
Extraction is Optional for Progress: Here is a massive relief—the moment you interact with the final mainframe terminal, the quest instantly marks itself as complete. You do not need to successfully extract to save your quest progress. Even if you go down right after, you just need to head back to Shani in the hub to hand it in.
Quest Rewards
Once you have successfully booted up the mainframe, head back to Shani in the vendor hub to turn in the quest. For your trouble, she will reward you with a nice injection of gear to help with your future raids:
3x Showstoppers
3x Trailblazers
It is a straightforward quest once you know the layout, and splitting it across a couple of matches makes it incredibly manageable.